


 Home >
 Knowledge Base >
 Community >
 Downloads >
Creating a KVB Project within KAS IDE
A KVB project can easily be created from within the KAS IDE software. Following are the step-by-step instructions. KVB (Kollmorgen Visualization Builder) is the software used for developing HMI screens and programs for the AKI series HMI panels. Variables in the KAS program can be linked to tags in KVB using Modbus addresses, but this is all handled quite simply by the KAS IDE. The term “tag” in KVB refers to a variable. These tags can be linked directly to objects, such as an analog numeric field, so as to view or edit the value of the tag. Tags can also be affected by actions of buttons. As the value of a tag is changed, this data is transferred through Modbus TCP communication to the KAS program. Likewise, as the value of a variable changes in the KAS program, the data is transferred through Modbus to the tag in the HMI program.
1. Open or create a KAS project.
2. Locate the Variables tab in the Dictionary. If it is not already open, click Dictionary on the View menu.

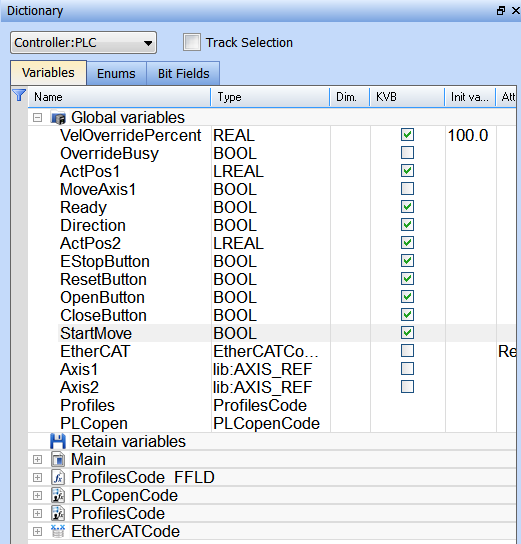
3. Expand the groups of variables. Most commonly used are Global and Main.
4. Notice the checkboxes in the KVB column. Place a check mark for each variable that you want to use in your KVB project.
5. Create the KVB project. There are three ways to add a KVB project to KAS:
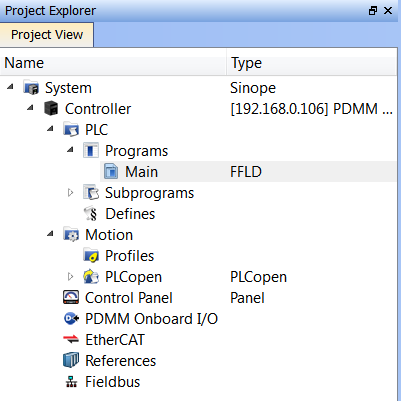
(Screenshot before adding a KVB project)

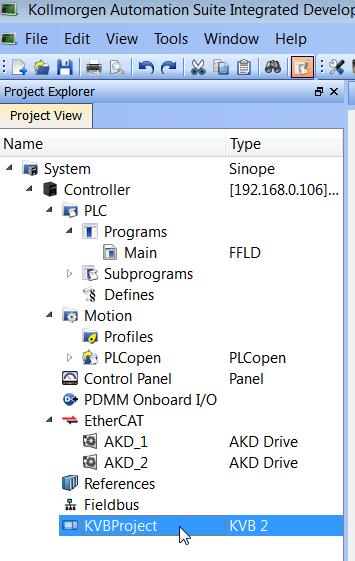
(Screenshot after adding a KVB project)

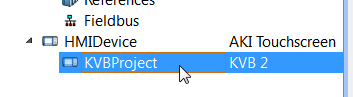
(Or after adding an HMI Device)

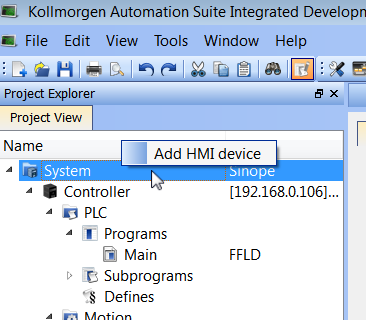
Method 1: (Preferred Method)
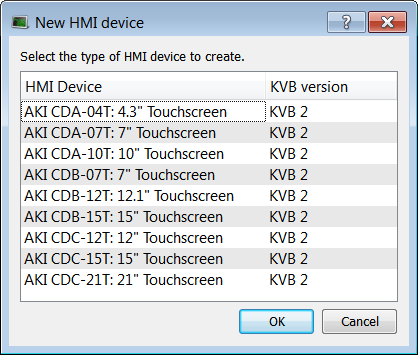
Right-click on System and click Add HMI Device, then select the AKI panel. When adding an HMI Device, KAS will automatically create the KVB project as well.
If you intend on importing an existing KVB project into the HMI Device, you should first delete the automatically created project.
Using the “Add HMI device” is the preferred method, since it allows you to select the AKI panel that will be used. Therefore, the project will be created with the appropriate screen size and aspect ratio.

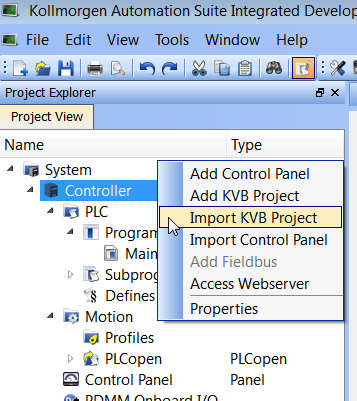
Method 2:
Right-click on Controller and click Add KVB project. Keep in mind that adding a KVB project using this method will create a KVB project intended to be run on a PC. If an AKI panel will be used, the project must be converted to the appropriate panel model in the project settings. The PC screen option does not have all of the features of the AKI panels.


Method 3:
Right-click on Controller and click Import KVB project.

6. Compile the KAS project.
7. Double click on “KVBProject” in the Project Explorer to open the project in KVB. You must already have KVB version 2.10 installed on your PC. (It could take up to several minutes for the project to open.) If you imported a KVB project, the navigation item will be the name of the project that you imported.
8. As KVB opens the project, it will prompt you to convert the project to the latest version. This is required and not reversible. After the conversion, the project will only open in KVB version 2.10.


Once the KVB project is created and the tags are added, you can start creating objects in the HMI screen and linking them to the tags. For more information on programming in KVB, please see documentation specifically for KVB.
Adding or Removing Tags:
If you wish to add a new tag or remove a tag in the KVB project that is associated with a KAS variable, simply close KVB, check or uncheck the box for that variable in KAS, and compile the KAS project. Then open the KVB project and the tag will be added or removed. The other tags will remain the same.
Importing Project:
If you choose to import an existing KVB project, you must place the project files into a compressed (.zip) file. Please note that the zip file should not contain the parent folder. When KVB projects are created, KVB creates a parent folder to contain all of the project files/folders. Only zip the files and folders that are within the parent folder (the parent folder is the folder containing the .kvb2 file).
Controller IP Address:
When a KVB project is created within KAS, the IP address for the PDMM or PCMM is automatically set in the controller settings in the KVB project.
Template:
If you have an existing KVB project but do not want to import the entire project, you can make templates for each screen that you want to use in your new KVB project. Then you can add screens in your new project by selecting a template. This allows you to not have to recreate the graphics on the screens.
Copying a KVB Project:
If you wish to make a backup copy or duplicate of your KVB project (whether within the KAS IDE or in the standalone KVB), use “Save As” in the KVB File menu.
